Hailstorms don’t send warnings you can rely on. They show up fast, hit hard, and leave behind damage that isn’t always obvious at first glance. And once the storm passes, you’re left with one critical task figuring out How to Document Hail Damage for an Insurance Claim the right way. This isn’t just about snapping a few photos and calling your insurance company. It’s about building a clear, compelling case that proves what happened, how severe the damage is, and why you deserve a full and fair payout.
For homeowners in Irving, this process matters even more. Storms here aren’t rare. And insurance companies know that. That means your documentation needs to be sharp, organized, and impossible to ignore. Let’s walk through this step by step. Real strategies. Real detail. No guesswork.
Why Proper Documentation Changes Everything
Here’s the truth most homeowners don’t hear upfront: insurance claims are decided on evidence, not assumptions. You may know your roof was hit hard. You may even see damage. But unless you can prove it clearly with photos, timestamps, and supporting records it becomes a debate. And in that debate, the better documentation wins.
Strong documentation:
- Speeds up your claim
- Reduces disputes
- Increases payout accuracy
- Protects you from underpayment
Weak documentation does the opposite. That’s why learning How to Document Hail Damage for an Insurance Claim isn’t optional. It’s your advantage.
Understanding Hail Damage: What You’re Really Looking For
Not all hail damage looks dramatic. That’s where homeowners get caught off guard. A roof can look “fine” from a distance while quietly deteriorating underneath.
Types of Hail Damage You Must Recognize
1. Functional Damage
- Impacts the roof’s ability to protect your home
- Leads to leaks, structural issues, or long-term deterioration
2. Cosmetic Damage
- Visible dents or marks
- Often dismissed by insurers but not always harmless
Common Damage Areas
- Asphalt shingles: bruising, granule loss, cracking
- Metal roofs: dents, coating damage
- Tile roofs: chips or fractures
- Gutters: dents and misalignment
- Siding: impact marks
- Windows: cracks or seal damage
Here’s the catch: insurers may classify damage as “cosmetic” to reduce payouts. Your documentation must show why it’s more than that.
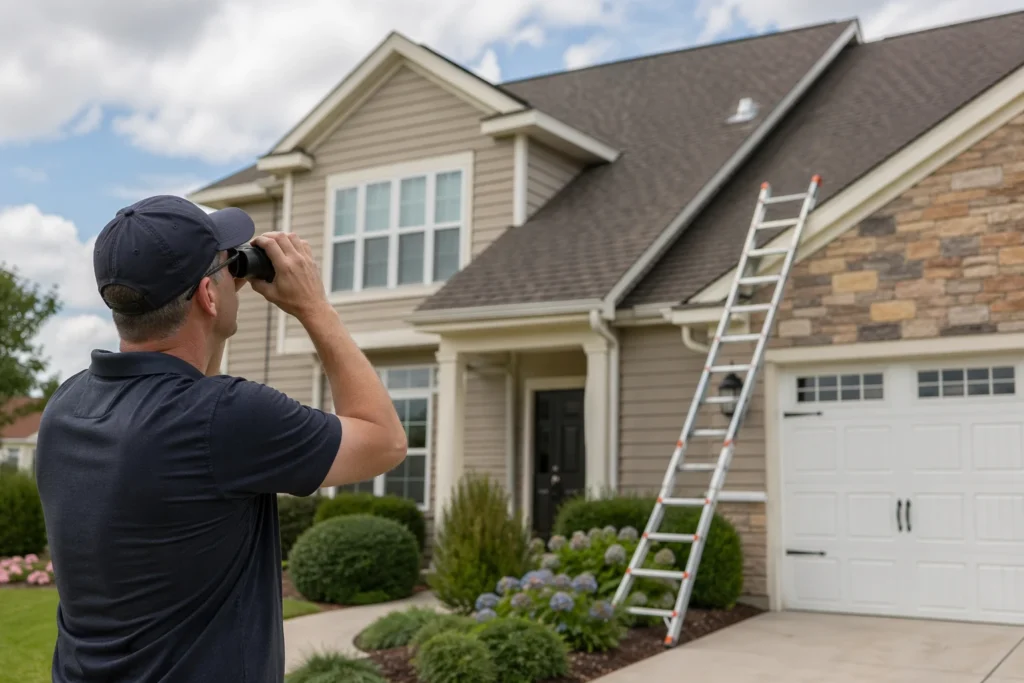
Step 1: Prioritize Safety Before Inspecting
Let’s slow down for a moment. The storm just passed. You’re curious. Maybe even worried. It’s tempting to grab a ladder and take a look. Don’t.
Post-Storm Risks Include:
- Slippery surfaces
- Loose shingles
- Hidden structural weaknesses
- Debris hazards
Smart Approach:
- Start from the ground
- Use binoculars or zoom lenses
- Only climb if it’s safe or better yet, leave it to professionals
A hospital visit isn’t worth a roof inspection.
Step 2: Start With Ground-Level Documentation
This step is simple. But it’s powerful. Before focusing on details, capture the full scene.
What to Photograph:
- Entire roof from multiple angles
- Yard debris (branches, leaves, scattered materials)
- Dented gutters or downspouts
- Damaged outdoor items (furniture, grills, vehicles)
Why this matters:
It shows the storm’s impact beyond your roof. It creates context. And context strengthens your claim.
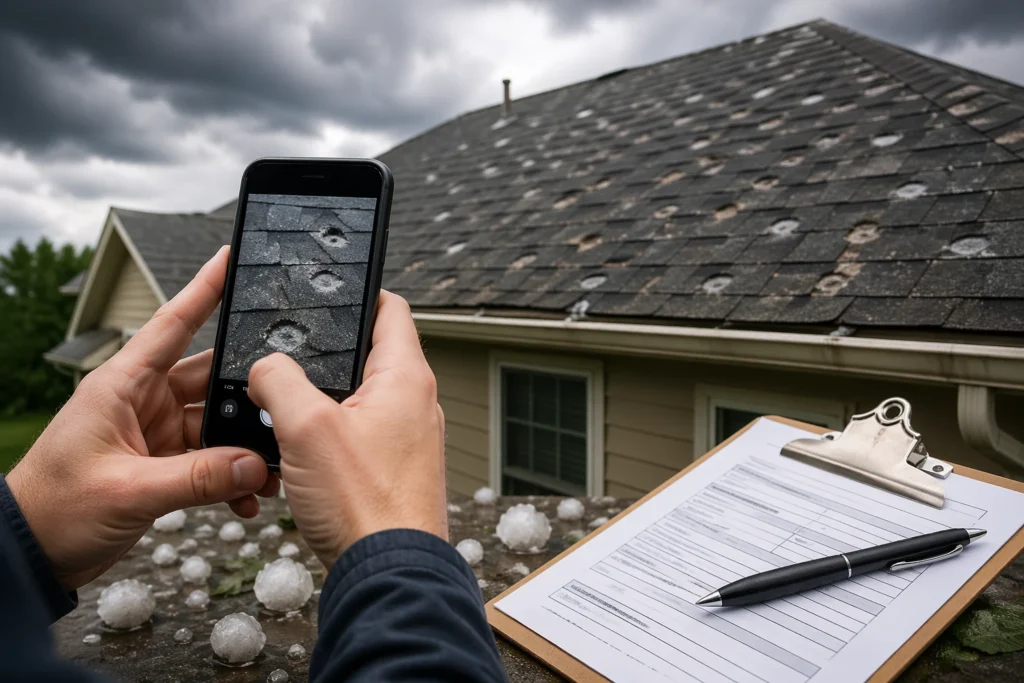
Step 3: Take Clear, Detailed Photos and Videos
This is where most of your claim strength comes from. When learning How to Document Hail Damage for an Insurance Claim, this step is everything.
Photo Strategy
Take three types of images:
- Wide shots – show the full area
- Mid-range shots – highlight affected sections
- Close-ups – capture specific damage
What to Capture
- Shingle bruising (soft, dark spots)
- Granule loss exposing asphalt
- Cracks or splits
- Dents on metal vents and flashing
- Gutter impact marks
- Siding dents
Pro Tips
- Use natural lighting
- Avoid shadows blocking damage
- Take multiple angles of each issue
- Keep images steady and clear
Don’t Skip Video
Walk your property. Talk through what you see. Mention the date and storm. It adds a layer of authenticity that photos alone can’t match.
Step 4: Document the Date and Storm Details
Timing can make or break your claim. Insurance companies cross-check your claim with weather data. If your timeline doesn’t match recorded storms, your claim becomes questionable.
Record the Following:
- Date of the storm
- Time (approximate is fine)
- Hail size (pea, marble, golf ball, etc.)
- Duration of the storm
Supporting Sources:
- Weather apps
- Local news coverage
- National weather services
In Irving, storm activity is often well-documented. Use that data. It strengthens your timeline and removes doubt.
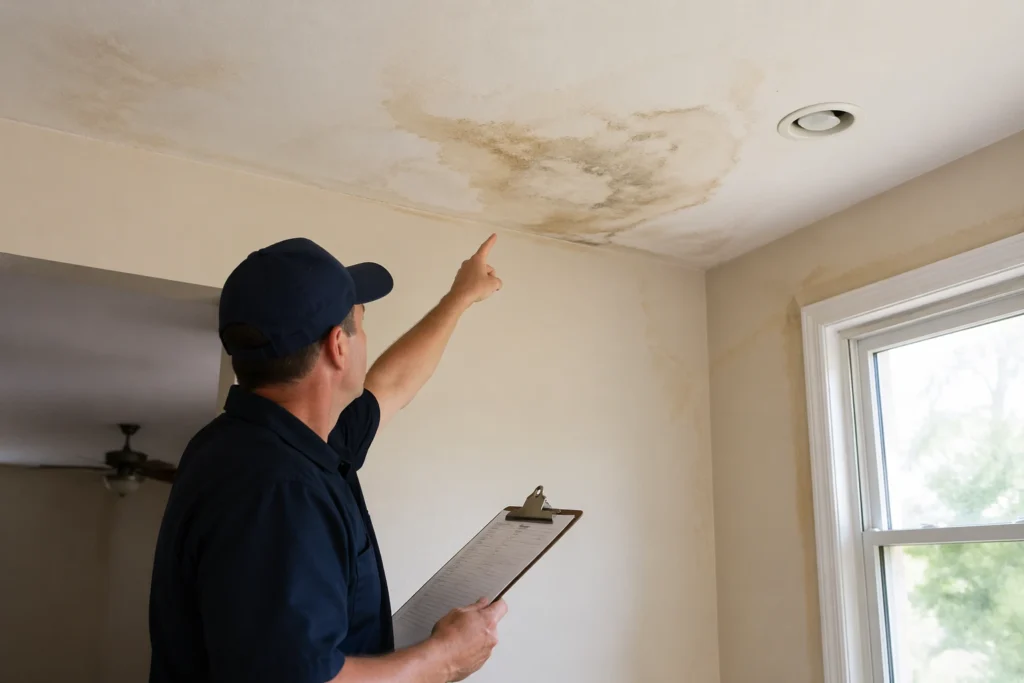
Step 5: Inspect and Document Interior Damage
Exterior damage tells part of the story. Interior damage completes it.
Check These Areas Carefully:
- Ceilings for stains or discoloration
- Attics for moisture or leaks
- Walls for bubbling paint
- Insulation for dampness
Why This Matters
Interior damage proves that the roof’s protective layer has been compromised. Take photos. Take notes. Be thorough.
Step 6: Gather Supporting Evidence
Now we build depth.
Photos show damage. Documents show history.
Collect These Items:
- Previous roof inspection reports
- Maintenance records
- Repair receipts
- Warranty details
This establishes a baseline condition. It shows your roof wasn’t already failing before the storm something especially important when filing a Hail Damage Roof Insurance Claim.
Step 7: Get a Professional Roof Inspection
Here’s where things shift from good to strong. Professionals know what to look for and what insurers look for.
What They Can Identify:
- Subtle hail impacts
- Structural weaknesses
- Areas requiring full replacement
- Code-related repair needs
For homeowners in Irving, this step often determines whether a claim is partially approved or fully covered.
Step 8: Create a Damage Report File
Now you organize everything into one clean system.
Your File Should Include:
- Photos and videos
- Written observations
- Storm details
- Inspection reports
- Receipts and maintenance records
Organization Tips:
- Use labeled folders (digital and physical)
- Sort by category (roof, interior, exterior)
- Add dates to everything
Clear organization = easier approval.
Step 9: Avoid Common Documentation Mistakes
Even strong claims fail because of small errors.
Watch Out For:
- Blurry images
- Missing timestamps
- Incomplete coverage
- Ignoring minor damage
- Delaying documentation
The longer you wait, the harder it becomes to prove storm-related damage.
Step 10: Prepare for the Insurance Adjuster Visit
This is your opportunity to present everything you’ve gathered.
What to Do:
- Have all documentation ready
- Walk the adjuster through damage areas
- Share photos and videos
- Point out specific concerns
What Not to Do:
- Don’t assume they’ll find everything
- Don’t stay passive
- Don’t rely only on their report
You’ve done the work. Now show it.
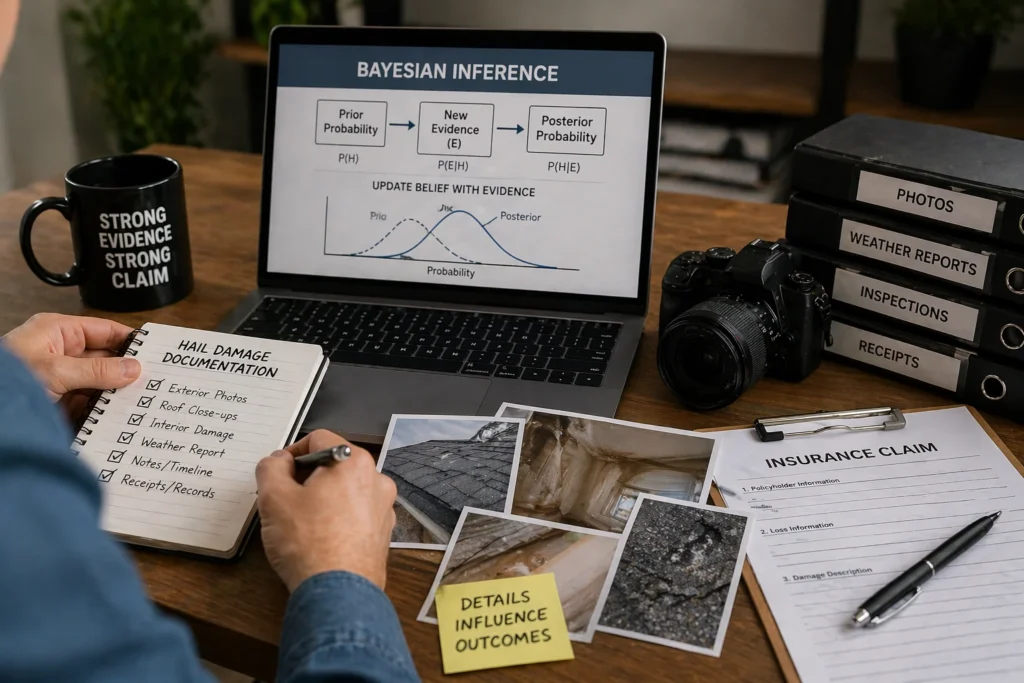
Advanced Insight: Why Detail Matters More Than You Think
Strong claims often come down to one thing precision. In complex systems, small details influence big outcomes. This is similar to how Bayesian inference works in statistics, where every piece of evidence updates the probability of an outcome. In your case, every photo, note, and record strengthens your claim’s credibility. The more precise your documentation, the harder it becomes for your claim to be undervalued or denied.
Final Thoughts: Strong Documentation Wins
Let’s bring this home. Knowing How to Document Hail Damage for an Insurance Claim puts you in control. It removes guesswork. It replaces uncertainty with evidence. And in a place like Irving, where storms can hit without warning, that control matters.
Take your time. Be thorough. Document everything. Because at the end of the day, insurance companies don’t pay for what might be damaged. They pay for what you can prove.
FAQs
Immediately ideally within 24–48 hours to ensure the damage is clearly tied to the storm event.
You can start documenting on your own, but a professional inspection adds credibility and may uncover hidden damage.
Clear, well-lit photos showing both wide areas and close-up damage are essential for proving the extent of impact
Yes, supporting weather data helps confirm the timing and severity of the storm, strengthening your case.
You can submit additional documentation later or file a supplement if new damage is discovered.
Maintenance records, previous inspections, and dated photos can help show your roof’s condition before the storm.
Yes, but only to prevent further damage be sure to document everything before making repairs.
You can request a re-inspection or hire a public adjuster to advocate on your behalf.
It’s not required, but it adds strong supporting evidence and helps provide context that photos alone may miss.
It varies, but proper documentation can significantly speed up approvals and reduce delays.